
Windows Sandbox is a brand new feature in the Windows 10 Operating System. It is the lightweight isolated environment inside your Windows 10 OS where you can test untrusted application. You can think of it as an another isolated Windows 10 stacked inside your Windows 10 OS.
The application you install in Sandbox doesn’t affect your Host. Moreover, once you close Sandbox, the application it installs also deletes automatically. You can think of Sandbox like Firefox focus browser. The program you install in Sandbox is like the pages you open in firefox focus. Once you close the browser, it automatically deletes your browsing history and cache pages.
This feature is available only in Windows 10 Pro and Enterprise edition. This is the Hardware Virtualization which isolates Windows Sandbox from its host.
Configuration Necessary for Windows Sandbox Feature
You must have Windows 10 Pro or Enterprise having at least 18301 Build version.
Moreover, your Hardware must have 64 Architecture.
Your BIOS must handle virtualization.
Windows Sandbox requires 4GB of RAM, however, we recommend 8GB of RAM.
Your CPU should have at least 2 cores as well as at least 1GB free disk space.
Read also: How to Enable PUP or PUA Protection in Windows Defender?
How to enable Windows Sandbox in Windows 10 Enterprise and Pro?

Image Credits: Microsoft Tech Community
First, you need to enable Virtualization in your Windows 10 OS.
Now, You can enable Virtualization in Windows in two ways.
In the first one, Virtualization is by default enabled in your Windows 10 OS via your BIOS.
Moreover, The second one dedicates to nested virtualization which you can enable via the below PowerShell command.
Set-VMProcessor -VMName -ExposeVirtualizationExtensions $true
Once you enable virtualization, you are ready to enable Windows Sandbox Feature.
To enable Windows Sandbox feature, first open Windows Features by typing and enter “Windows Features” in Cortona.
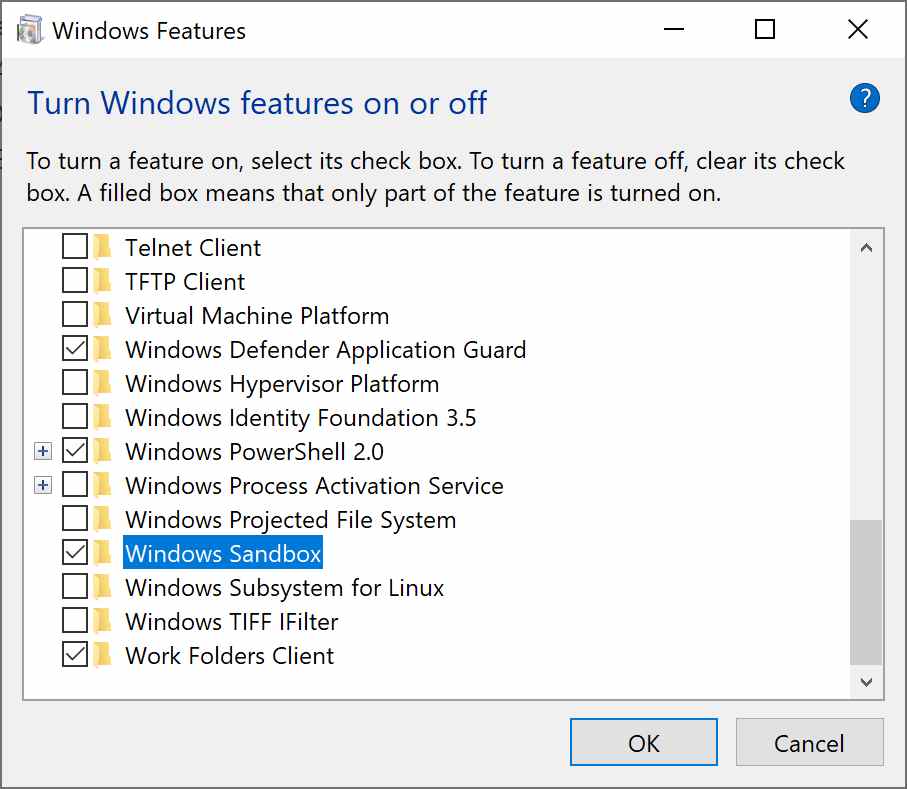
Image Credits: Microsoft Tech Community
Now, the Windows Feature box is open; you see a list of Windows Features there. All you have to find is “Windows Sandbox” and click on the box next to it to enable it.
Now, you are ready to install and test apps inside Sandbox. Open it and Drag and drop the executable file and then install it inside it.
Read also: Why not to Install Every Windows 10 Update?