
Are you one of those people who keep everything organized and decluttered? Are you someone who has trouble focusing if their things are cluttered and unorganized? Do you feel like your productivity gets affected if you function in an unorganized setup? If so, then we have a super-efficient solution for you to organize things on your Windows computer.
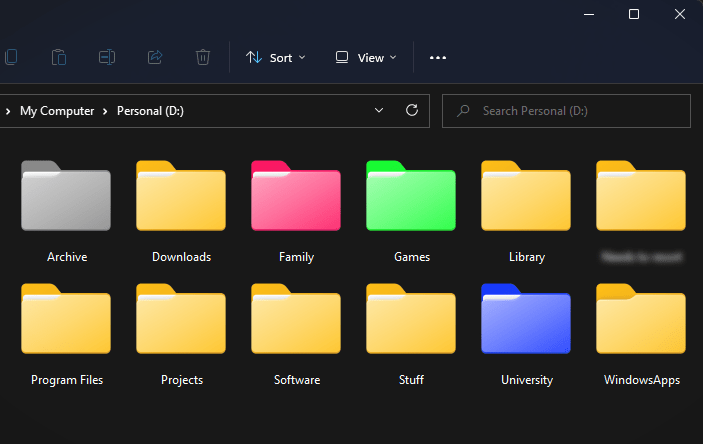
In Windows 11, the default folder colors are sandy color. And the only way to label these folders is by renaming this, which is really an inconvenience if you think about it. Since all of the folders look exactly the same, it gets almost impossible to spot a particular one in a swarm of others.
Of course, you can always use the search option to look for your desired folders. But it takes ages. Fortunately, we have a solution for you that changes the visual appearance of your folders to make them distinctive. We will share with you a way to change the folder color on Windows so that it is easily distinguishable. So if you are wondering how to change folder color on Windows 11, read on.
Video Guide How to Change Folder Color in Windows 11/10
How to Change Folder Color on Windows 11
Folder Colorizer 2 is a folder customization app for Windows. Developed by Softorino, the same company that is known for creating WALTR and Softorino YouTube Converter, Folder Colorizer 2 was released in 2012. Being the first of its kind, Folder Colorizer 2 lets you change the default sandy folder colors and transform them into cool-looking folders.
It integrates the option to change folder colors in the context menu. So if you right-click on a folder icon, you will find the option to colorize it. You can choose from a number of preset colors or create your own color by using the color wheel. How cool, right? Just right-click on a folder and colorize it within a second. It is a super fun way to make your folders easily distinguishable.
Here’s what makes Folder Colorizer 2 special:
- No ads or intrusive malware.
- Over 5 million downloads.
- Safe and reliable.
- Offers 10 million color options.
- Superfast.
- Vouched by tens of credible tech blogs.
- Comes with a free trial.
Here’s how you can change folder color on Windows 11:
Step 1: Download and Install Folder Colorizer 2 on Your PC
Download and install Folder Colorizer 2 on your Windows PC for free. It comes with a free trial that you can activate upon installation. If you like the app and want to continue using it forever, you can purchase it for a low price of $2.92 per month, billed annually.
Step 2: Right Click on Any Folder
Right-click on any folder on your PC and you will find a “Colorize” option in the resulting menu.
Step 3: Colorize!
In the “Colorize!” menu, select a folder color from the presets. If you don’t find the color that you are looking for, you can click on the “Colors…” option at the bottom of the list to create your own color using the color wheel.
That’s how quick and simple it is to colorize your folders. It only takes 1 second and you can literally choose from millions of colors.
In case you don’t like a color and want to revert to the original folder color, you can right click on a folder, go to “Colorize!”, and select the “Restore Original Color” option.
Conclusion
So go ahead and colorize your folders, guys! Now that you know how to change folder color on Windows 11, try out the app and let us know what you think. It is a super fun way to customize your folders and make them easily distinguishable. Your PC never looked this cool.
It lets you change one folder color and then you have to pay for it.
You can change one folder color for a fee.
Will not install on Windows 11