

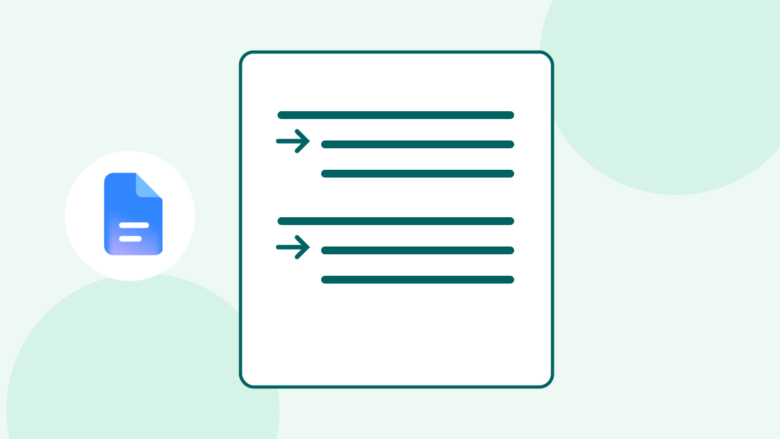
Keep source entries clear as text wraps
Use the Hanging setting in Google Docs instead of manual spaces. Review the source details, required style and final layout as three separate tasks.
Key Takeaways
- A hanging indent leaves the first line at the left edge. Later lines move inward.
- On a computer, select the text and use the Hanging setting in Indentation options.
- Keep each reference in its own paragraph. Let long entries wrap without adding manual spaces.
- Check the needed citation style as well as the indent. A neat entry still needs correct source details.
Your reference list looks tidy until a long title wraps. Then its next line starts at the left margin, like a new entry. Adding spaces may fix one line, but the repair breaks when you change a word.
A hanging indent in Google Docs solves that layout problem. On a computer, select the entries. Open Format, Align & indent, then Indentation options. Choose Hanging under Special indent. Set the size you need. Click Apply. Google’s help documents that route.
The setting moves the later lines of each paragraph inward. The first line stays at the starting edge. That makes it easier to find where the next entry begins. This guide explains the setup and common fixes. It also shows how to review a source list. A neat layout still needs accurate source details.
Understand what the indent changes
A hanging indent is a paragraph layout. It does not add spaces to the start of each wrapped line. It tells the editor where those lines belong as the text flows.
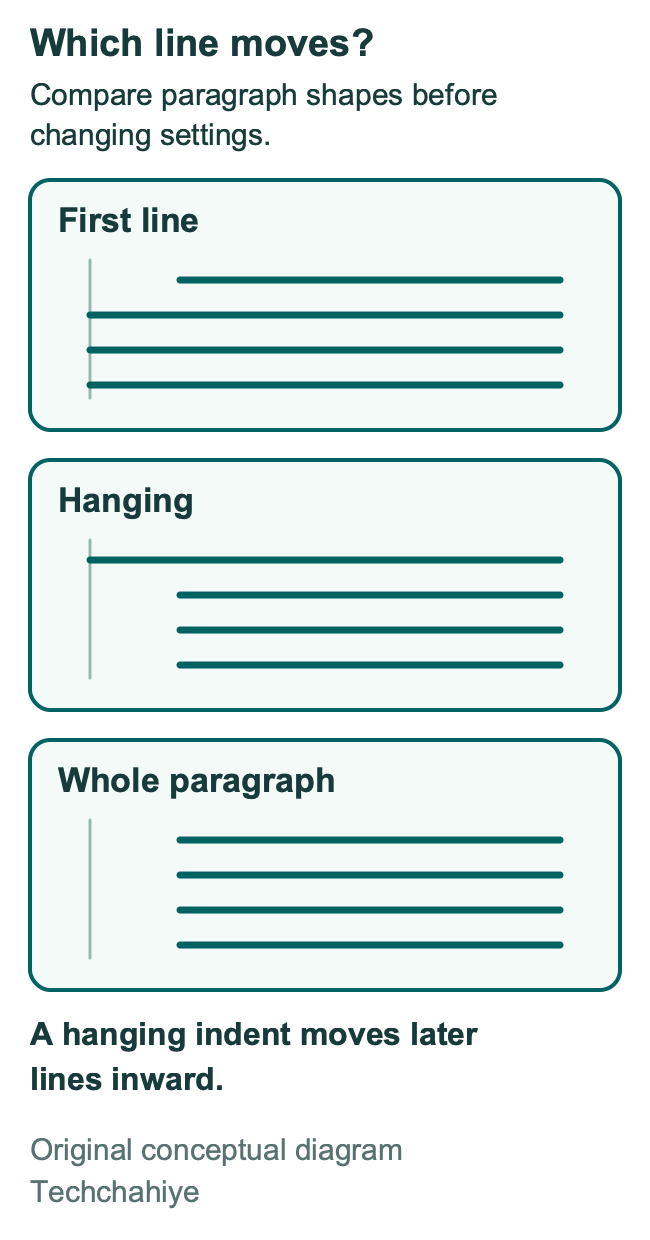
Compare it with a first-line indent. An essay may use a first-line indent. That moves the opening line inward. The rest stay at the left edge. A hanging indent does the reverse. Moving the entire paragraph is a third choice. That shifts the first line and later lines together.
These shapes can look similar when an entry fits on one line. The difference appears when the text wraps. Use a longer entry to check the result. A short author name and title alone may not show whether the setting is right.
| Layout | First line | Later lines |
|---|---|---|
| First-line indent | Moves inward | Start at the paragraph edge |
| Hanging indent | Starts at the paragraph edge | Move inward |
| Whole-paragraph indent | Moves inward | Move inward too |
The table explains the shapes. It does not tell you which style a class or publisher needs. Read the stated rules before you submit the file.
For a simple visual test, look at two entries that wrap. Their first lines should share one starting edge. Their later lines should share the inset edge. If one entry starts elsewhere, inspect that paragraph. Leave the rest of the paper alone.
Prepare the entries before you format them
Add the source details first. Then you can see how each entry wraps. You can still edit them later. Work with real entries. Short placeholder names may not fill more than one line.
Keep each reference as a separate paragraph. APA gives this rule in its reference-list guide. It also calls for a half-inch hanging indent. A paragraph boundary gives the editor a new first line for the next entry.
Do not add a return every time a line reaches the edge of the page. That starts a new paragraph. It does not let the same entry wrap. The first-line rule then applies again, which can spoil the shape you wanted.
Show the marks to inspect the text structure. Google’s View menu includes Show non-printing characters. Its help says these marks reveal paragraph breaks, line breaks, spaces and tabs. They can help you distinguish structure from empty space.
Look at the end of each source entry. There should be a deliberate boundary before the next entry. Within a long entry, let the editor wrap the text. Inspect stray spaces and tabs. Remove the padding you added for layout. Keep the source title and other needed text intact.
Work on a copy when the list has come from several files. Google’s file help describes Make a copy. Keep a clean starting copy. Use it to check the source details after a repair. It is useful when you are fixing layout and checking facts at the same time.
Add the hanging indent on a computer
Highlight the entries you want to format. Leave the heading out of the selection. Include it only if it needs the same layout. Open the menu route in the introduction and select Hanging. Google lets you set the size in the box beside Hanging. Then apply the change.
Start with one longer entry if the file is complex. Inspect its first line and later lines. Check that the result is right. Then apply that setup to the rest of the list.
Read the units shown in the dialog. Use the amount needed for the document. Use the stated value. Do not guess from the ruler alone. Match the setting to the stated amount.
After applying the change, click elsewhere and read the list. Check that the heading has stayed where you wanted it. Then check an entry near the middle and one at the end. Scroll through the list. A paragraph near the end may still need the change.
Try a small edit inside the longest entry. Add or revise a real word, then see how the text wraps. The later lines should follow the paragraph’s layout. You should not need a new row of spaces each time a line changes.
This is a layout check, not a reason to alter a source title. Keep the actual wording accurate. Remove any test word from the copy. Check for it before you keep or submit the file.
Choose the amount from the needed style
APA’s reference-list setup calls for a 0.5-inch hanging indent. It also says to double-space the list without extra space between references. APA lets an entry continue onto the next page. Let the editor manage those breaks.
MLA’s formatting guide also uses half-inch hanging indents. These apply to works-cited entries. The MLA explains why the shape helps: a reader can spot the beginning of an entry. Those are style instructions, not proof that every kind of list needs the same treatment.
Check the requested edition and any course-specific instructions. A teacher may provide a template or a named style guide. Follow that guide. Avoid mixing an old handout with a screenshot or tool output.
Half an inch equals 1.27 centimeters. That is a unit conversion, not a different indent. It comes from multiplying 0.5 by 2.54 centimeters per inch. W3C lists this unit relation in its table. Read the units your dialog shows. Use the value your style calls for.
Do not confuse an indent with a margin. A margin defines the page’s content area. An indent changes a paragraph’s position within that area. Page margins affect more than the list. Use the paragraph setting for this task.
Make the list fit the style through its actual rules. If it becomes longer, that may be a valid result. Keep the type readable. Keep the needed spacing and full source details too. A shorter page count is a separate goal.
Avoid manual spaces and tabs as a substitute
Manual padding ties the repair to the current line breaks. You may change a title, a date or a font. A word may move to a new line. Your added spaces remain in the text.
That is why a paragraph setting is useful. It records the intended shape, not the position of each word in one draft. You can edit a source entry and let the editor lay out its new length.
Tabs have valid uses. A row of tabs does not set a hanging-indent rule. If the list uses tabs from an earlier attempt, inspect them with visible marks. Remove only the padding you added for layout. Do not strip characters from source data without checking what they do.
Clean one entry first. Apply its paragraph setting. Then check the result. Then repeat the approach for the rest. Avoid a whole-file search-and-replace that deletes every space or tab. You may affect material outside the reference list.
Imagine a hypothetical entry with a long report title. You add five spaces before its second line. Later, you correct the title and it becomes shorter. The spaces are still characters in the entry. The layout setting can handle the new line length. It does not need those added spaces.
The example is about behavior, not a fixed number of spaces. No fixed space count fits every font and line length. Use the stated indent amount. Use the named paragraph control instead.
Fix a list when the wrong lines move
Look at which lines move. If only the first moves inward, check the special-indent choice. Compare the result with the three shapes in the table. Make sure you are applying the shape you need rather than a general indent button.
If every line moves together, check your selection. Review its paragraph settings too. You may be changing the whole paragraph’s left position. Start with one entry so you can see what each control changes.
If the whole document changes, check the selection. Also inspect the paragraph marks. Several visible lines may belong to one paragraph. Line and paragraph breaks do different jobs. The visible marks help you tell them apart.
If one entry looks wrong, leave the rest alone. Check that entry for added spaces. Look for extra paragraph marks. Compare its settings too. Comparing it with a neighboring entry can show what differs.
If a one-line entry seems unchanged, try the visual check on a longer one. There are no later lines to move in a single-line entry. It may look the same even with the right setting.
Keep the source text separate from the repair. Do not delete a title or an author’s name to shorten a line. The list must still identify each work after the repair.
Keep the heading outside the entry format
A list heading and a source entry have different jobs. The heading names the section. The entry identifies a work. Select the entry paragraphs for the hanging indent. Keep the heading outside that selection.
This matters most when a heading wraps. A misplaced setting can make its second line look like part of an entry. Check the heading after you format the list, even if it looked fine before the change.
Use the label needed by the assignment. APA’s setup page uses References, while MLA’s formatting material uses Works Cited. Do not assume that a tool’s generic heading matches every needed style.
For example, you may have a heading, a short note from an instructor and the actual list. Select only the list if the other paragraphs need a different layout. A broad selection is fast, but it is not useful if it changes the wrong material.
A clean structure also makes later editing easier. Give the heading its own paragraph. Then add each new entry in its own paragraph. Make the intended boundaries clear before you focus on the visual details.
Use the citation tool with its limits in view
Google Docs includes a Citations tool under Tools. Google lists three styles in its help. They are MLA eighth edition, APA seventh edition and Chicago Author-Date seventeenth edition. Check which edition your assignment needs. Compare it with the tool before you use the output.
The tool can hold source details and insert citations or a bibliography. A source saved in the sidebar still needs a fact check. Review the author, title, date and source type against the actual work.
Google says that generated labels and other tool elements appear in English. Source titles keep the language you entered. This distinction can matter if your document uses another language. Review the generated text along with the source details.
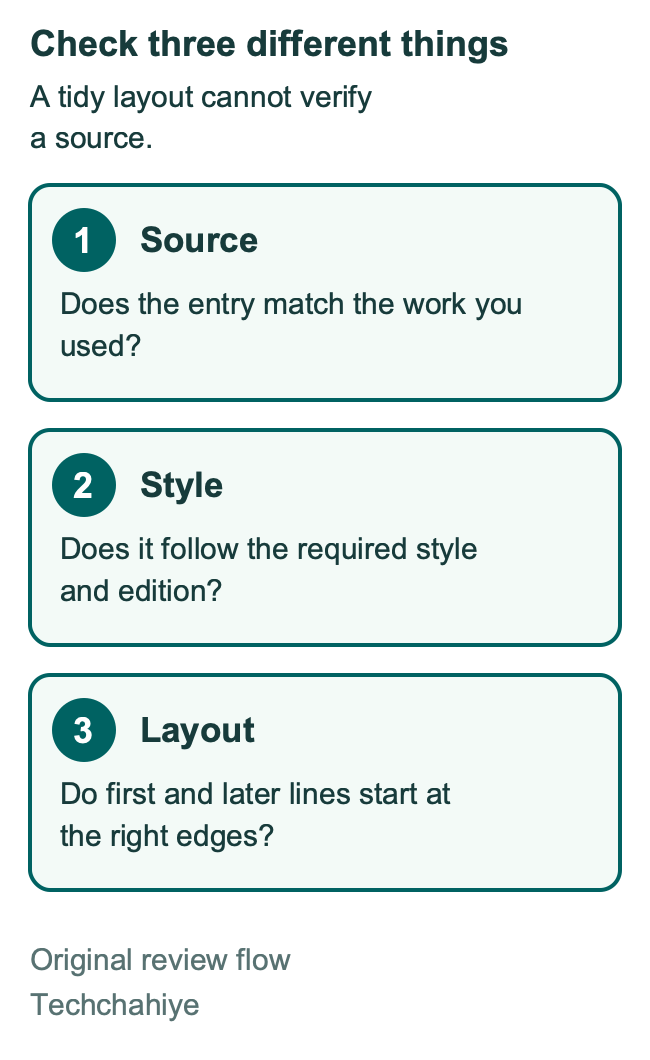
Think of three separate checks. First, does the source exist and match the work you used? Second, does the citation follow the needed style and edition? Third, does the paragraph have the right visual layout? Passing one check does not establish the others.
If the bibliography looks different after insertion, inspect the saved result. Check each new paragraph for the hanging indent. An earlier setting may not cover it. Check the new entries in the actual list.
Review source details before the final layout pass
A well-shaped entry can still be wrong. Check for a missing author. Check which date the entry uses. Look for an incomplete title too. Those problems need the source, not the ruler.
Open the work and compare it with your entry. Use the publisher or organization page where possible. If the source is a report, check which version you read. Keep enough detail for a reader to identify that work.
APA’s guidance asks writers to compare the reference list with the citations in the text. Use that as a separate review step. A tidy page still needs every cited work. Follow the exceptions and details in the needed style when they apply.
Split a group review into two tasks. One person can check source details. Another can review the layout. They may catch different kinds of error. A final editor can then review the complete file so the changes agree.
Keep a brief note when information needs checking. “Confirm report date from publisher” is a clear task. Do not fill the blank with a guessed year so the entry looks finished. Complete information is more useful than a perfect-looking placeholder.
Check the output you will submit
Google provides download and print options through File. Use the route that matches the needed submission. Then open the result and inspect the reference list itself.
Check the longest entry, a short entry and one near a page boundary. Their first lines should begin where you intended. Their later lines should share the inset edge. Keep the heading outside the entry style.
Read the final line of one entry and the first line of the next. They should remain distinct. Look for blank paragraphs left from earlier manual spacing. Remove unwanted padding in the source file, then create a fresh output.
Google documents a tab choice for print and download. Choose the current tab or all tabs. Confirm the scope before submission. A missing section is a different problem from an indent that looks wrong.
For a mobile reader, inspect the file on a small screen too. This guide’s menu steps are for a computer. Do not assume that a mobile list-indent control performs the same task. If the app lacks the needed control, finish the precise layout on a computer and review the output.
A short final list check
Inspect one long entry, one short entry and a page-boundary entry. Keep the heading outside entry formatting. Compare source details and the required edition. Open the actual output before submission.
Keep a reusable starting file
Keep a clean copy once the list is right. It can help with your next paper in the same format. Google’s template help describes making a copy of a file. That can give you a starting point without overwriting the paper you finished.
Use clear placeholder labels such as “Add the next source entry here.” Do not leave a made-up source in the template. A later editor might treat it as real. A template helps you format real research. It should not pass itself off as finished research.
Record the needed style and edition in a note you can remove before submission. Keep that note outside the reader’s final text. The next time you use the copy, check whether the course requirements have changed.
A reusable paragraph layout saves repeated repairs. It does not remove the need to check each source or the final file. Keep those tasks separate so a familiar template does not hide a new mistake.
Did You Know?
A one-line reference may look the same after you apply a hanging indent. The change affects later lines. A one-line entry has no later lines yet. Check a longer entry before deciding that the setting failed.
Conclusion
Use a paragraph rule to make the shape. Keep each entry in its own paragraph, apply the needed hanging indent and let the lines wrap. Then check the style, source details and final output as separate tasks.
If you are fixing an old list, begin with one long entry. A small, clear repair is easier to repeat than a page full of manual spaces.
FAQs
What is a hanging indent in Google Docs?
It keeps the first line of a paragraph at its starting edge and moves the later lines inward. Reference lists often use that shape. A first-line indent moves the opening line. A whole-paragraph indent moves all lines. These are three different shapes.
How large should the hanging indent be?
Use the amount needed for your document. APA’s reference-list guidance and MLA’s cited formatting material use half an inch. Confirm the style and edition. Check the assignment rules too. Then choose the amount for your list.
Why does my whole list move instead of the later lines?
Inspect the special-indent choice and the paragraph’s left position. Also check the selection and paragraph marks. Start with one long entry and compare its shape with the intended result. This is clearer than changing the whole paper several times.
Should I press Enter at the end of every line?
Let a long entry wrap on its own. Use a paragraph boundary when the next source entry begins. Manual returns can create more first lines within an entry. Check the marks if the shape looks wrong.
Does a correct indent make my citations correct?
No. The indent changes the layout. You still need the right source details, citation style and edition. Check the works you used and compare the list with the citations in your text. Review the final output after those details are complete.
References
- Google Docs Help: Add lists and hanging indents
- Google Docs Help: View non-printing characters
- Google Docs Help: Add citations and a bibliography
- APA Style: Reference list setup
- MLA Style Center: Why hanging indents help readers
- MLA Style Center: Formatting a Research Paper
- W3C: Absolute length units
- Google Docs Help: Create, copy or download a file
- Google Docs Help: Print a file
- Google Docs Help: Use document tabs
- Google Docs Help: Use templates
- Techchahiye: Change the default font in Google Docs
- Techchahiye: Make a table of contents in Google Docs
- Techchahiye: Productivity Apps Guide
