

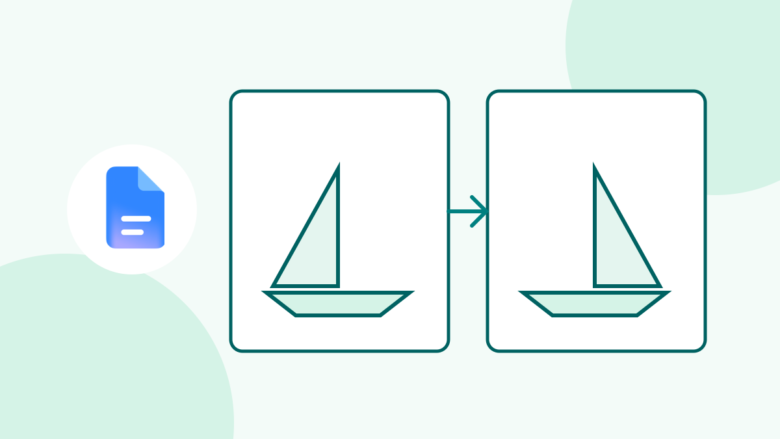
Mirror a picture with its meaning intact
Use the computer Drawing tool, choose the right axis and keep a clear source. Review image size, captions and the final file before sharing.
Key Takeaways
- Use a computer and the Drawing tool to mirror a picture in Google Docs.
- A horizontal flip swaps left and right. A vertical flip swaps top and bottom.
- Check words, arrows and labels after a flip. Their meaning can change with the picture.
- Keep the original file, then review the drawing at its final size before you share it.
To flip an image in Google Docs, copy it into a new Drawing on a computer. Select the picture there. Open Actions, choose Rotate, then choose Flip horizontally or Flip vertically. Save and close the drawing to place the result in your document.
Upper St. Clair School District’s IT guide documents that route. Google’s own help confirms the Insert, Drawing, New path and the tools for adding pictures to a drawing. The key is to select the picture inside that workspace before you look for a flip command.
A mirror effect can help a photo fit a page. It can also reverse text, change a pointing hand or make a diagram say something false. Choose the direction first. Then check the content and its place on the page.
How to flip an image in Google Docs on a computer
Use these steps when the picture is already in your document. Keep the original until the new version looks right.
- Click the picture and copy it. Use the Copy command or your usual keyboard shortcut.
- Place the cursor where you want the new drawing.
- Open Insert, then Drawing, then New.
- Paste the picture into the drawing space.
- Click the pasted picture to select it.
- Open Actions, then Rotate. Choose Flip horizontally for a mirror across left and right. Choose Flip vertically to swap top and bottom.
- Check the result in the drawing space.
- Select Save and close to return to the document.
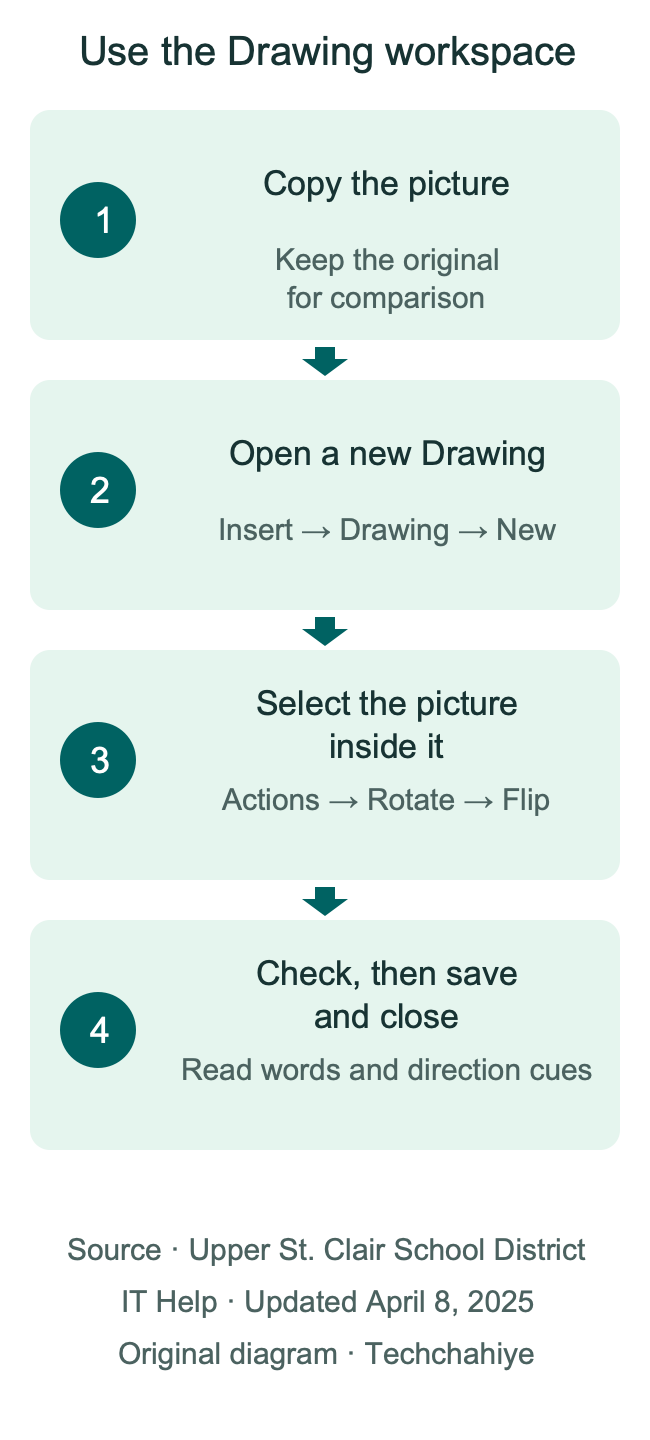
This follows the district help desk’s procedure, updated April 8, 2025. Copying first gives you an original to compare with the result. Once you have checked the new drawing, remove any spare copy that you do not need.
For a picture saved on your computer, start at Insert, Drawing, New. Use the Image tool inside the drawing to add the file. Google documents that image tool as part of the drawing workspace. Select the added picture before using the flip route.
Choose the change that matches the problem
A flip reflects a picture across an axis. A turn changes which way the whole picture faces. A crop removes part of its outer edge. Choose by what the finished image needs to show.
| What you want to change | Useful action | What to check |
|---|---|---|
| A person faces the other side. | Horizontal flip. | Check words and scene details. |
| Top and bottom swap. | Vertical flip. | Check labels and direction. |
| A sideways photo stands upright. | Rotation. | Check the top edge. |
| A spare border takes up space. | Crop. | Keep needed content near the edge. |
| A picture needs less space. | Resize in proportion. | Keep text and detail clear. |
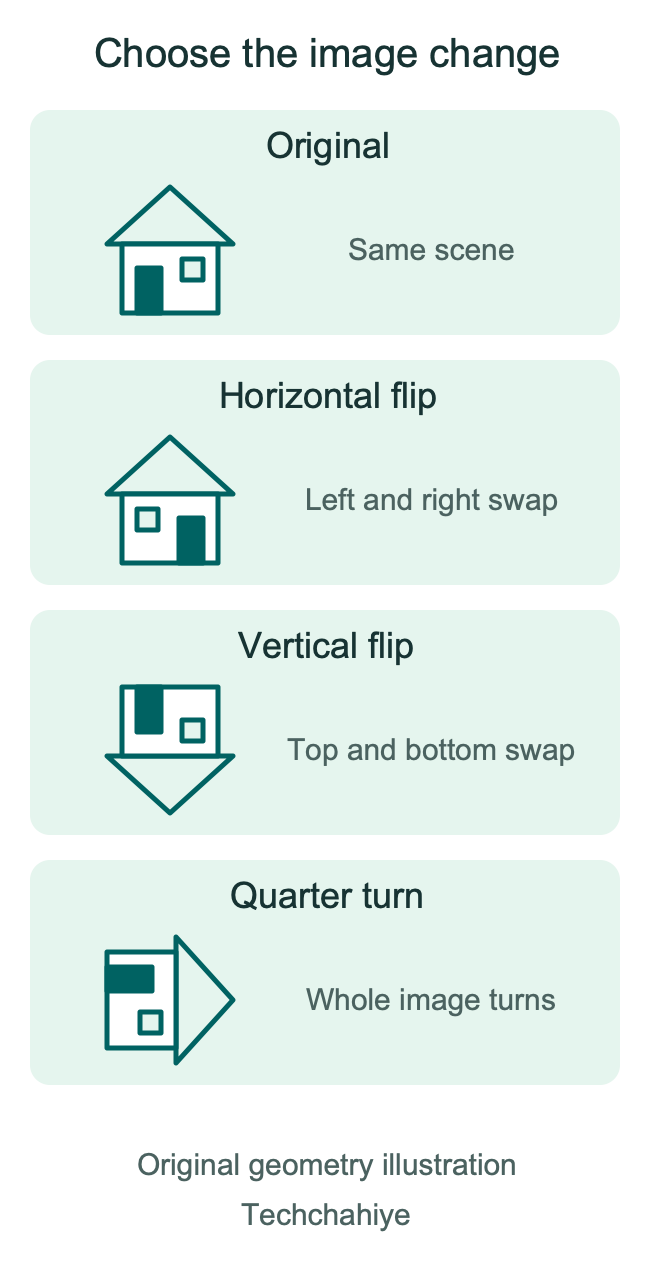
A simple example makes the choice clear. Imagine a photo of a person pointing to a sign. A horizontal flip moves the pointing direction to the other side. It also mirrors the sign’s letters. Turning the photo upside down changes the whole scene in a different way.
Use an object with a clear left and right as your reference. A face, arrow or uneven shape works well. A plain circle may look the same after a flip, so it is a poor way to judge whether the command worked.
Keep a clean original before you edit
Save the source picture where you can find it. Give the edited version a clear purpose, such as a mirrored photo for a handout. This makes it easier to tell which file belongs in a later revision.
For a shared or important document, consider a working copy. Google’s file guide describes File, Make a copy on a computer. Use that copy to work on the picture and page layout. Apply your final choice to the main file when it is ready.
Choose a comparison point before you start. You might note that the person faces right, a door sits on the left or a label reads from left to right. After the change, use that same point to review the result. This is more useful than relying on a vague sense that the picture looks different.
Keep related assets together. A source photo, a caption and a diagram may belong to the same section. Record which one you altered. An editor may later supply a new photo. Your note helps them decide whether to make the same change to it.
Select the picture inside the drawing
The document page and the drawing workspace have different jobs. The page holds the drawing among your text. Inside the drawing, you select and change its picture or other elements.
If the menu offers no useful flip choice, look at the current selection. The picture should be selected inside the drawing space. A cursor in a text paragraph or an empty part of the canvas gives you a different context.
If the drawing contains several elements, identify the one you mean to change. A picture, arrow and caption may serve different purposes. Select the photo itself when only the photo should face the other way. Review nearby items before you save.
For example, a worksheet might pair a mirrored bird photo with a written label below it. The label should remain readable. Build and check those parts with that goal in mind. A whole-image flip changes its content. Words within the photo will also face the other way.
A blank drawing after paste needs a different check. First confirm that you copied the picture itself. If pasting still fails, use the drawing’s Image tool to add the source file. Work from the original asset rather than a screenshot of a blank or failed result.
Make words, arrows and real details part of the review
Read every word within the image after a horizontal flip. Look at names, room numbers, signs and product labels. A mirrored photo can still look polished while its writing becomes hard to use.
Separate artwork from evidence. A decorative photo of a plant can often face either way without changing its role. A screenshot that teaches a menu path has a fixed visual meaning. Reversing it could put controls on the wrong side and confuse the reader.
Maps, charts and diagrams need similar care. An arrow may encode a route or sequence. A left and right label may describe an actual part of a device. If a flip changes the meaning, choose a better source image. You could also rebuild the diagram from accurate source material.
For a clearly labeled example, imagine a guide to a phone’s side buttons. The picture shows a power key on one edge. A mirror effect would move that key to the other edge in the illustration. A caption alone would make the reader work harder to reconcile the error.
Portraits can contain clues too. A logo on a shirt, a hand gesture or an object in the background may reveal the change. Ask whether any of those details matter to the document. Keep the scene accurate when it explains a real person, place or process.
Size the result without stretching it
Keep the picture’s proportions when you make it smaller. Google’s drawing guide describes corner handles for resizing an image. A corner change helps you review both width and height together.
Aspect ratio means the relationship between width and height. In a hypothetical example, a picture is 1,200 pixels wide and 800 pixels tall. Its width-to-height ratio is 3 to 2. A version at half those dimensions would be 600 by 400 pixels. The shape stays the same because both dimensions use the same scale.
That example describes geometry, rather than a Google export result. It does not tell you how sharp your own file will look. Start from the best source you have, then inspect the result at the size readers will see.
Tiny text is a common sign that a figure has too much to carry. Making the whole picture wider may force a poor page layout. Instead, consider a tighter, useful crop or a separate close view of the important detail. Keep enough context for readers to understand the close view.
A large white border can also shrink the useful part of a picture on the page. Decide whether the border has a role. If it adds none, crop the spare area before settling on the final display size.
Use rotation and cropping for their own tasks
Google’s drawing help describes a blue dot outside an image for rotation. It also documents holding Shift to turn in 15-degree steps. Use that control when you need to change the angle of the picture.
A sideways scan, for example, needs its top edge brought upright. A mirror effect would leave its letters reversed. Judge the page from the intended reading position before making a second change.
Google’s image help gives a separate crop route on a computer. Select the image, choose Crop, adjust the border and finish with Enter or a click outside the image. This trims unwanted edges. Check the boundary for fingers, arrows, labels or parts of a device that the reader needs.
When you need both a crop and a flip, plan the final content first. A crop may hide the detail that shows which way the image now faces. Keep a clear reference point visible until you are happy with the result.
Google also documents Reset image for eligible image edits. Its stated role is to return an inserted photo to its original form. Keep your source file as well. A drawing and a regular photo can offer different editing controls.
Place the drawing where the reader needs it
Put the image near the text that explains it. A good position answers a question at the moment it arises. It also reduces the need for the reader to jump between pages.
Google’s image guide lists page-layout choices such as In line, Wrap text and Break text. It also describes position controls for certain wrapped images. Review the controls offered for the selected object in your own document.
With a short caption, a simple block of image followed by text is often easy to read. Dense text wrapped into a narrow strip beside a large figure can be awkward. Judge the actual space left for sentences and labels.
Pages and Pageless can also explain a missing option. Google says Text Wrapping and Position controls are unavailable in Pageless documents. Choose Pages when the task depends on those page-based controls. The desired output should guide that choice.
For a printed worksheet, check the page break around the drawing. A photo near the bottom may leave its explanation on the next page. Move or resize the content so the pair stays useful. If a spare page appears, review spacing and breaks. Keep any text the reader still needs.
Work within the phone app’s image tools
Use the computer Drawing procedure for the flip workflow described here. Google’s Android and iPhone help documents mobile resizing and rotation. For Docs cropping, those pages direct you to a computer. They do not give this Drawing flip procedure.
On Android, Google’s guide says to turn on Print Layout from More, then select the image. The squares adjust its size, while the attached circle changes its rotation. These controls help with a sideways or oversized picture on a phone.
Google’s iPhone and iPad guide describes the same Print Layout check for Docs. After selecting the image, use its size handles or rotation circle for those tasks. Review the whole page after a change, since a small screen can hide the effect on nearby text.
If you only have a phone and need a mirror effect, make a mirrored copy with an image editor you already use. Then add the edited asset to the document with the available image controls. The editor’s own help should guide that step. Keep the original and inspect any words in the new copy.
A phone’s desktop view may offer fewer tools. Use a computer for the documented workflow. A computer gives you the documented workspace for this route. Use the phone to review the finished document’s reading experience as well.
Keep captions and alt text accurate
A caption explains why a picture belongs in the document. Alt text describes the useful visual information for someone using a screen reader. Each can serve a different reader need.
Google’s accessibility guide says images and drawings should have useful alternative text. Select the graphic and use Image options, then Alt text. Review any automatic description to make sure it matches the actual image.
Describe what the final version shows. Here is an example for a simple scene: “A person faces left toward a document.” For a process diagram, describe the relevant order or relationship. The fact that you used a flip command may have no value to that reader.
An edited picture may need an updated description. If the visual direction matters, use the direction now shown. For a real process, check the picture and wording together. Both should describe the process as it works.
Keep small labels readable in the figure itself too. Alt text gives access to the meaning. A clear visible caption helps someone scan the page. Place key steps in ordinary document text. Readers can then follow the task without reading words from a picture.
Check the file you plan to share
Review the final document in the form its reader will receive. A shared Doc, a downloaded file and a printed page each deserve a direct look.
Google documents File, Download for saving a copy in a chosen file type. After downloading, open that file. Check the image direction, size, caption and page breaks there. Choose the output your reader needs before spending time on detailed page placement.
For a printed handout, review the print preview. Confirm that the picture fits within the printable page and that a nearby label has stayed with it. Does the diagram use color to convey meaning? Check that meaning in the print output you plan to use.
For a shared document, review the picture at a normal reading size. A large zoom can make tiny labels seem more usable than they are. Also look at the file on a phone when mobile reading matters to the audience.
A final content check is simple. Read the nearby sentence, inspect the image and read the caption. All three should tell the same story. Once that is true, remove spare comparison copies and leave the version the reader should use.
Did You Know?
Two horizontal flips return a shape to its starting arrangement. Each flip swaps the same pair of sides, so the second swap restores them. You can see this with the uneven house in the illustration. A shape with a plain, even outline may hide the change.
Conclusion
Knowing how to flip an image in Google Docs starts with the Drawing workspace on a computer. Select the picture, choose the flip direction and check its meaning. Keep words readable, preserve important details and review the final size. Then use a caption and accurate alt text to make the result useful to more readers.
FAQs
Will flipping the image also reverse words inside it?
A horizontal flip mirrors words that are part of the image. Read signs, labels and screenshot text after the change. If those words give instructions, use a suitable source image. You can also keep the text separate from the picture.
Why can I rotate a picture but cannot find a flip command?
The two controls can appear in different editing contexts. Use the computer Drawing route and select the picture inside the drawing space. The school-district procedure places the flip choices under Actions and Rotate. Selecting a picture on the main document page gives you a different set of controls.
Can I use the Google Docs phone app for the same flip steps?
Google’s mobile image help documents resize and rotate tools. The Drawing workflow here uses a computer. Use the documented computer route for those flip steps. On a phone, make a mirrored copy in an image editor first. Use that editor’s supported controls, then insert the copy.
How can I keep a mirrored photo from looking stretched?
Preserve the relationship between its width and height as you resize it. Use a corner handle and review the result at its final reading size. Start with a clear source file. If labels become too small, simplify the figure. You can also add a useful close view. Give that detail enough space.
What changes if I insert a drawing from Google Drive?
Google says a drawing inserted through From Drive links to the original drawing. The inserted object has Update and Unlink choices. Decide whether you want later source changes to reach this document. Review the result after an update. Check the direction and labels, plus any caption that refers to them.
References
- Google Docs Editors Help — Learn how to use drawings and markups
- Upper St. Clair School District Help Desk — How to Flip an Image in Google Docs and Slides, updated April 8, 2025
- Google Docs Editors Help — Insert or delete images and videos
- Google Docs Editors Help — Crop and adjust images on a computer
- Google Docs Editors Help — Crop and adjust images on Android
- Google Docs Editors Help — Crop and adjust images on iPhone and iPad
- Google Docs Editors Help — Insert images on Android
- Google Docs Editors Help — Insert images on iPhone and iPad
- Google Docs Editors Help — Create, view or download a file
- Google Docs Editors Help — Make documents and presentations more accessible
- Techchahiye — Make columns in Google Docs without layout problems
- Techchahiye — Find the cause of an unwanted page in Google Docs
